
Putting Deck Tiles on Concrete
Composite deck tiles are an excellent way to bring style and practicality to your outdoor living space. If you have decided to install composite decking tiles in your outdoor space, you may be wondering if you can lay composite decking over concrete. Continue reading to learn why you can — and should — lay composite decking over concrete, as well as a few tips for a successful installation.
Can You Put Composite Decking on Concrete?
Yes, you can install composite decking on concrete. Concrete patios and other hard surfaces are an ideal place to lay deck tiles because they are stable and durable. Concrete provides a more stable surface for composite decking, compared to surfaces such as gravel or sand. Installing decking directly over dirt or grass isn’t recommended. In addition to increased stability, there are several reasons it’s a good idea to install deck tiles on top of concrete:
- A quicker installation process: A pre-existing solid base cuts installation time in half, as there is no need to pour or install a base before beginning deck installation.
- You can hide old concrete: If your concrete patio is cracked, discolored or showing signs of wear and tear, you do not have to worry about removing and re-pouring concrete. Instead, cover your patio up with stylish, long-lasting composite deck tiles.
- It is the perfect way to refresh your space: Give your outdoor space a refresh or prepare it for the housing market with composite tile decks. While a concrete patio is practical, it lacks the personality, style and easy maintenance that comes with composite decking.
- Composite deck tiles are easy to maintain: Are you tired of repairing, painting or refinishing cracked or discolored concrete? Installing composite decking over concrete is a low-maintenance solution. Our UltraShield® Naturale™ composite deck tiles are designed to withstand direct sunlight, the elements and the test of time without fading, splitting or warping. UltraShield® deck tiles are also easy to clean and do not stain.
- It is easier to customize: Composite deck tiles are available in many different colors and patterns, making it easier than ever to showcase your personality. Choose a classic, subtle look, or go bold with alternating colors and patterns. Whatever your taste, NewTechWood® has you covered.
- No more weeds: When you install composite deck tiles on a pre-existing concrete patio, you do not have to worry about weeds or plants sprouting from under your tiles.
- Concrete is drier: Compared to installing composite deck tiles on ground-up gravel or compacted sand, concrete provides a dry, moisture-free base.
What You Need to Put Deck Tiles on Concrete
You’ll need a few tools to install decking over concrete. A little pre-planning and organization before you start results in a faster, smoother installation.

To install composite deck tiles on a concrete patio, you need:
- A flat surface: A solid, flat surface is ideal for installing composite decking on concrete. However, if your patio is cracked or a little uneven, you can still make things work. One option is to purchase a self-leveling concrete repair product. After putting the product on your uneven or cracked patio and letting it dry and set, you can continue installing your deck tiles as normal.
- A saw: Depending on the shape and size of your concrete, you may need to cut some deck tiles to fit To do this, you can use a chop saw, table saw, circular saw or jigsaw. When operating a saw and cutting your tiles, be sure to wear protective gear over your eyes and mouth.
- 180 grit sandpaper: If you have to cut your deck tiles to fit certain parts of your patio, you will need sandpaper. Use a 180 grit or higher sandpaper to grind down the cut edges and make them smooth before applying a water protectant sealant.
- A water-resistant composite sealant: NewTechWood UltraShield® Naturale™ composite deck tiles are designed to resist stains, warping, splits and other common decking problems. However, if you have cut your tiles to shape and fit them, we recommend applying a water-resistant sealant to the cut edge after sanding it down. The sealant will protect the vulnerable edge from weather and water damage.
How to Add Deck Tiles on a Concrete Patio
One of the best parts about composite deck tiles is that do-it-yourself installation is simple. You do not need to spend money or time hiring a professional to install your new deck. Instead, you can install your composite decking yourself and have full control over the process, as well as the satisfaction of a job well done.
Choose the Right Deck Tiles
Choosing the best deck tiles for your project is the key to a successful installation. When selecting your new deck tiles, consider the following things:
- Your budget: How much can you afford to spend on the entire project? Do not forget to factor in the cost of ongoing maintenance when looking at the numbers. Composite deck tiles are low-maintenance, making them a very cost-effective decking solution. Use our cost tool to estimate the total cost of your deck tile project.
- Maintenance: Choose a decking that fits into your lifestyle. If you do not have the time or ability to frequently replace, repaint or repair your deck, choose a material that will not fade, warp or splinter over time.
- Your style: Your outdoor space gives you the opportunity to display your personality or add a touch of style to your home. NewTechWood UltraShield® Naturale™ composite deck tiles are available in a variety of colors and patterns, including custom color options.
- Installation process: If you want a simple, DIY installation, choose a decking material that is designed to snap into place.
- The environment: By choosing a sustainable, recycled composite deck tile, you are playing a part in preserving the environment.
Protect Yourself

Make sure you are wearing the right clothing and equipment to protect yourself while installing your new composite decking, including:
- Gloves: Heavy-duty work gloves with a good grip will protect your hands from scratches, especially if you have to trim tiles to fit.
- Protective eyewear: If operating any type of saw, always wear protective eyewear. Goggles or a safety helmet can protect your eyes from flying particles or debris.
- Long sleeves: Long sleeves can protect your skin from scratches and sunburn —just be sure to keep your sleeves away from the saw if cutting tile.
- Sunscreen: Make sure you apply sunscreen before you begin putting deck tiles on concrete to protect your skin from sunburn while working outside.
- Respiratory protection: If operating a saw, wear respiratory protection — like a mask over your mouth and nose — so you don’t inhale small particles of tile.
- Rubber mallet: This will make it easier to connect the deck tiles together and put less strain on you.
Prepare the Surface
Before you begin, prepare your concrete patio for tile installation.
- Remove any furniture or debris from your concrete patio.
- Sweep the patio to ensure a clear workspace.
- If necessary, hose or pressure wash the concrete patio and let it dry.
Once you have prepared the installation area, wait for a dry, clear day to lay your composite decking.
Measure the Dimensions
Measure the dimensions of the concrete patio you plan to cover, so you know how many tiles you need. Measuring will also let you know if you will have to cut and shape any tiles to fit around obstructions or uneven spots. Once you measure your concrete patio, write down the measurements in square feet. Then, compare this number to the size of your chosen tiles to get an accurate count. Many customers order a few extra deck tiles in case of accidental damage during cutting.
Lay and Snap Tile
Unlike traditional wood decking, composite deck tiles do not need to acclimate. You can begin installing your new deck as soon as you receive your tiles. To install composite decking over concrete, follow these tips:
- Plan ahead: If laying patterned tiles, do not forget to pay attention to which tiles you are connecting. To make this easier, consider laying all tiles down on your concrete patio in the pattern you want before installing them. You can rearrange tiles if necessary. You also minimize the risk of mixing tiles up during installation if they are already in place. If you are planning a particularly intricate design or complex pattern, you might consider mapping your tile layout on paper before you start.

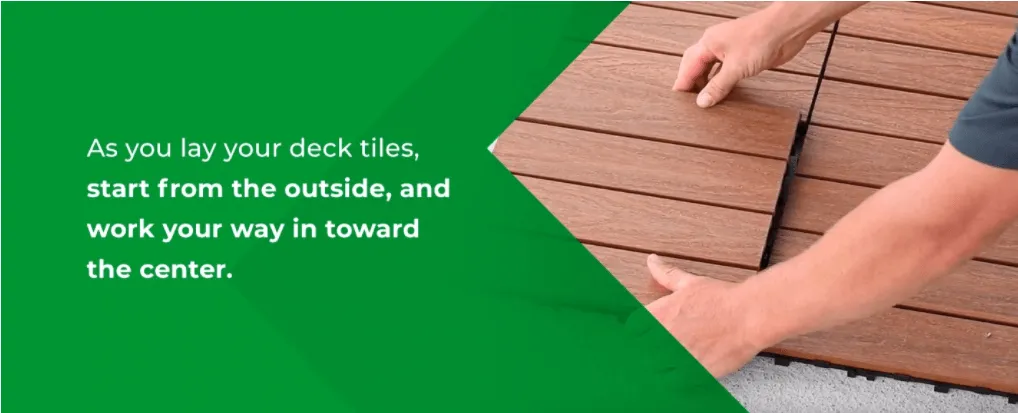
- Work from the outside moving inward: As you lay your deck tiles, start from the outside, and work your way in toward the center.
- Lay and snap tiles: This is the easy part. To install composite decking on concrete, all you need to do is align the dovetails of two tiles and carefully snap them together. NewTechWood UltraShield® Naturale™ deck tiles are designed with a four-way snap, so you can attach tiles in any direction you want. The rubber mallet may make this process easier.
Cut Tile If Necessary
Can you put decking on a concrete patio? Yes, but you may need to do some cutting or trimming to make your new deck tiles work in the existing space. If your concrete patio is a nontraditional shape or size, or if you have to work around immovable objects, there is no need to worry. Cutting and configuring your deck tiles is easy if you know what steps to take.
- Direct the end you plan to cut toward your house or another structural wall.
- Line up the tile and draw lines indicating where you need to cut. When marking your tile, use white chalk so you can easily wipe the lines away afterward if necessary.
- Use a saw to carefully cut the tile according to the marked lines.
- Lay the tile — without snapping or screwing it in place — against the area to make sure you have cut enough and everything lines up.
- Use sandpaper to grind and smooth the cut side of the tile.
- Apply a water-resistant sealant meant for composite decking materials to the cut edge and allow it to dry.
- Snap the newly cut tile into place and repeat as necessary until your deck is complete.
Install the Trim
The last step in the installation process is to install trim around your deck tiles. You should install trim for several reasons:
- To put a “finishing touch” on your deck.
- To keep people from tripping over the edges of your deck tiles.
- To accent or complement your chosen tile style, color or pattern.
NewTechWood® has three different types of trim available: straight trim sections, inside corner trim sections and outside corner trim sections. The sections are available in 14 different colors, so you can choose the best color to match the rest of your decking. The base of our trim pieces are constructed out of interlocking plastic and stainless steel screws, so you can feel confident that your trim is just as secure and rust-proof as your tiles. Just like our four-way interlocking tiles, our trim also has a flexible locking system. Once your trim is installed, you can sit back and enjoy your new composite deck.
Find the Right Deck Tiles at NewTechWood
NewTechWood® has been committed to providing top-quality, eco-friendly composite decking and deck tiles since 2004. Our UltraShield® deck tiles are the ideal solution for homeowners who want a low-maintenance, customizable deck tile that is easy to install.
- Fully capped: Our composite tiles are entirely capped, which means all four sides are encased with an advanced premium shield. This is the only way to ensure the ultimate protection.
- Composite core: The core of our UltraShield® tiles is made of recycled, highly dense materials that do not mold or rot over time.
- Durable: Composite tiles are resistant to spills and stains, as well as minor scratches, splits and warping caused by sun and rain exposure.
- Easy maintenance: Once your deck tiles are installed, have peace of mind knowing the hard work is behind you. With our composite tiles, you do not need to worry about repainting, oiling or replacing your tiles.
- Backed by warranty: We stand by our products and are confident you will love them, too. Our 25-year limited transferable warranty is one of the most comprehensive warranties in the industry.
See for yourself how UltraShield® compares to traditional decking and find UltraShield® Naturale™ composite deck tiles in a store near you today.

